
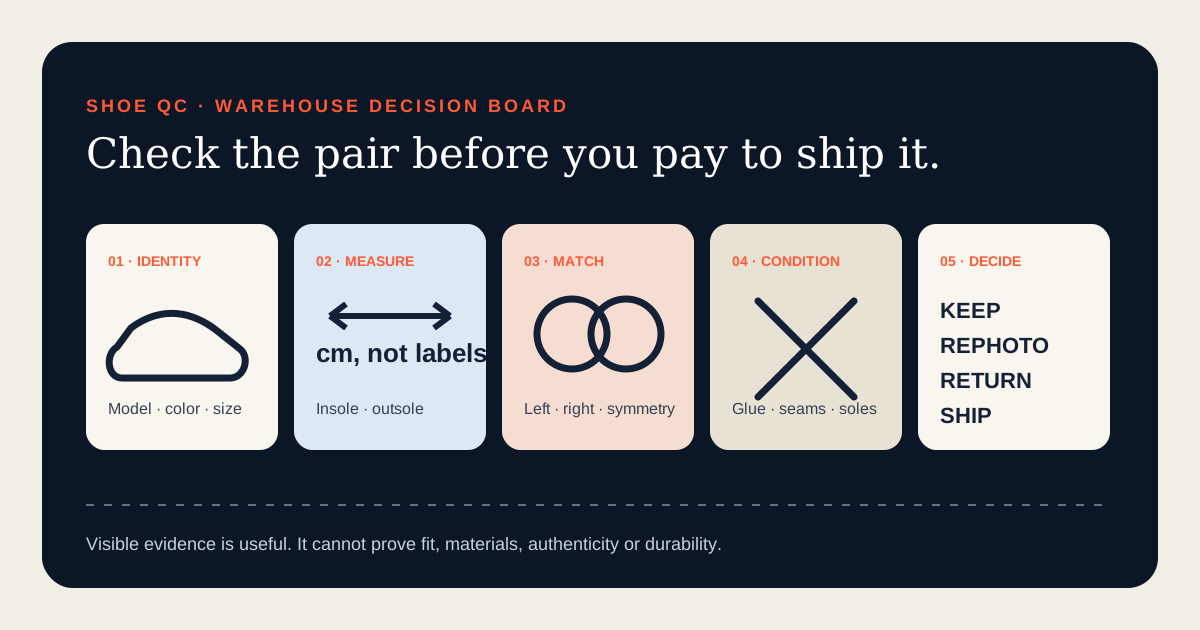
Start with a decision order, not a defect hunt
An OOPBuy shoe QC checklist should begin with identity. Compare the live order record with the photographed pair: seller, selected model, colorway, size, quantity and any promised accessories. Confirm that both shoes belong to the same pair and that the size markings agree. A dramatic close-up of glue is useless if the warehouse received the wrong color or two different sizes. Save the order option before a seller edits the listing, then work from broad identity to specific condition.
Use four possible outcomes throughout the review: keep, request one more photo, return or ship. “Keep” means the visible evidence is acceptable but the parcel is not ready. “Rephoto” means one unanswered question could change the decision. “Return” means the evidence supports an after-sales request while the control is available. “Ship” comes only after the pair is accepted and the packaging plan is settled. This order prevents a cosmetic detail from distracting you from a wrong variant or an expiring return window.
Know what the warehouse check can and cannot prove
OOPBuy’s current inspection notice says warehouse staff verify quantity, color, size and other specifications, then arrange storage. Its fine-photography notice says ordinary inspection generally provides three photos covering the front, back and side or logo. Those are platform descriptions of the service, not an independent guarantee that every angle, label or flaw will be visible. Count the images you actually received and judge the pair only from what they show.
The same inspection notice excludes color difference, size error and usage effect from its inspection scope and says professional categories and internal quality may not be verified. For shoes, photos cannot prove comfort, true-to-size fit, cushioning life, waterproofing, material composition, odor or authenticity. They also cannot reveal a defect hidden under an insole or inside a sealed component. Treat warehouse QC as visible receiving evidence. Do not convert a clean photo set into a claim that the product is genuine, durable or suitable for your foot.
Verify identity and pair matching first
Read every visible size mark: tongue tag, inner label, box label and any sticker on the pair. Compare the printed system—EU, US, UK or centimeters—with the option you ordered instead of assuming equal numbers across systems. Check that the left and right labels match each other. If a box label is shown, it should support the pair identity, but a matching box is not stronger evidence than the markings on the shoes themselves.
Next compare left and right construction. Look at toe shape, panel placement, eyelet count, lace color, heel height, logo position and outsole pattern. Camera perspective can make one shoe look longer, so ask whether the difference remains across more than one view. A genuine mismatch is repeatable: the size tag differs, a panel is absent, or an outsole pattern changes. A single tilted image is a reason to request a straight-on pair photo, not automatically a reason to allege a defect.
Request measurements that answer a real sizing question
A printed size is not a fit guarantee. If the seller provided an internal-length chart, compare it with your intended foot allowance and with a shoe you already wear—not only with a familiar size label. When the decision depends on length, request a clear measurement of the removable insole when possible. The tape should begin at zero, run flat from heel to toe and show both endpoints. If the insole cannot be removed, request the outsole length and label it as a different measurement.
OOPBuy’s warehouse-services notice currently lists detailed photos at CNY 1 each, requested either with the product order or after stock-in. Write one instruction per uncertainty: “photograph both size labels side by side,” “measure the removable insole from zero,” or “show the heel seam straight on.” Do not ask for “more QC.” A vague request can produce another attractive angle without the evidence you need. Confirm the live fee before purchase because published prices can change.
Inspect visible condition without inventing certainty
Review the pair under consistent categories: upper, seams, adhesive, hardware, lining, midsole and outsole. Look for stains, cuts, missing stitches, lifted edges, deep creases, crushed heel counters, scratched hardware, uneven printing and contamination on the sole. Compare the same zone on both shoes. Minor adhesive visibility or a thread end may be cosmetic; a separated panel, hole or incorrect component can affect the decision. Describe the observable fact and its location rather than using broad labels such as “bad quality.”
Lighting and compression matter. White balance can shift colors; shadows can resemble stains; a wide-angle camera can distort toe shape. When a suspected issue appears in only one view, request a close, well-lit image of that exact position and, when useful, the matching area on the other shoe. The extra photo should test a hypothesis. If it cannot distinguish harmless lighting from a return-worthy issue, it is not a useful request.
Protect the return option while you inspect
OOPBuy’s current returns notice defines the warehouse request window as 120 hours beginning with the next hour after the order changes to “Stocked in.” It says acceptance may not be available after the window and that the seller must agree to the return or exchange. This is a published platform procedure, not proof that every shoe is eligible. Save the stock-in time, current after-sales control, order option and the image that shows the problem.
Keep product tags, accessories, seals and required retail packaging intact while the decision is open. OOPBuy’s policy lists removed packaging, tags or accessories among situations that can affect eligibility, and it assigns customer-choice reasons differently from seller error or visible quality issues. Use the truthful reason. “Size label differs from ordered option” is evidence; “probably will not fit” is a personal sizing concern unless a measurable discrepancy supports it. The separate return guide explains the status and fee path in detail.
Decide what to do with the shoe box
A shoe box has three possible values: product protection, collector or resale relevance, and shape support during shipping. It also adds weight and, more importantly, volume. OOPBuy’s inspection notice says the ordinary domestic express box may be removed during storage, while fragile or special packaging is handled according to the actual situation. Distinguish the seller’s outer courier carton from the branded retail box before asking staff to discard anything.
Make the box decision after QC and before rehearsal or parcel submission. Keep it when condition or presentation matters and when the box supports the shoes. Remove it when you accept the loss of retail packaging and a smaller parcel can materially improve the route or cost. If you remove it, request adequate shape and moisture protection rather than assuming “no box” means “no protection.” The rehearsal guide can help when packed dimensions may change the route, but rehearsal cannot fix an unacceptable pair.
Use one final keep, rephoto, return or ship matrix
Keep the pair when identity is correct, visible condition is acceptable and no missing fact would change your decision. Request one targeted photo when the uncertainty is visible and answerable—for example, a hidden size label, an unclear stain or a needed insole measurement. Open after-sales promptly when the received option is wrong, the pair is mismatched or a material visible issue makes the item unacceptable. Ship only after you have accepted the pair, chosen the box plan and checked the current parcel route.
Before closing the review, record the order option, both size labels, pair overview, outsole view, measurement if needed, return-window deadline and packaging decision. Do not buy extra photos simply to collect evidence. Do not let free storage create a false sense that after-sales time is also long. And do not approve international shipping to avoid making a warehouse decision: returning a shoe after export can be far more expensive than resolving a visible problem while it is still in China.
Final shoe QC checklist
- Correct model, color, size and quantity
- Left and right labels match
- Pair shape and panels match across views
- Insole or outsole measurement answers the sizing question
- No unexplained stains, cuts, separation or missing parts
- Seller accessories and required packaging are present
- Stock-in time and after-sales deadline are saved
- One targeted photo requested only if it can change the decision
- Return reason describes an observable fact
- Shoe-box choice follows QC, protection and parcel needs
- Current route eligibility checked after acceptance
- Decision recorded as keep, rephoto, return or ship
Research record
Source titles are shown without outbound platform links. OOPBuy pages describe the service the platform publishes; they do not independently prove the condition, fit or authenticity of a particular pair.
- OOPBuy Inspection InformationPublished receiving checks, packaging handling and limits of visible inspection.
- OOPBuy Introduction to Fine PhotographyOrdinary photo scope and the purpose of specifically requested detail views.
- OOPBuy Returns and RefundsPublished 120-hour warehouse request window, seller agreement and eligibility conditions.
- OOPBuy Warehouse Value-Added ServicesDetailed-photo fee and request timing, plus rehearsal and customized packing scope.